Table of Contents
- Summary / Features- Operating Environment / Important Points
- Getting Started
- How to Use
- Screen Configuration and Operation
- "Select preset" Screen
- Preset Reflected Camera Screen
- "Edit preset" Screen
- "Frames selected" Screen
- Conversion Screen
Summary / Features
Summary
"Preset Camera" is a camera app which, by presetting naming conventions, data storage location, frames, and filters before photographing, automatically reflects them in photographs after being taken.When continuously taking photographs or photographing certain locations and objects, this app will automatically reflect given Presets, so there is no need to edit photographs after photographing.Other than the SD card, you can designate storage location to Evernote and dropbox.
Special Features
- Set Preset to be reflected in the photographs taken beforehand.Rules for file name, rules for storing folder name, frames and filters, among others, can be preset.
- Preset will be automatically reflected after photographing
After taking photographs, Preset will be automatically reflected.
- Designate storage to Evernote and Dropbox
Upload photographs to Cloud Service automatically after photographing.
- Convert photographs taken using a certain Preset, to a different Preset
Even after a photograph has been taken, you can easily convert and reflect a different Preset.
- Backup raw data and not reflect Preset
Generate photo data which is not affected by Preset, and create backup.
- Register Preset to the Widget
You can boot the preset camera and take photos with just one touch from the Widget.
- Filters to fabricate photographs
When taking photographs, you can add various expressions by filtering.
In addition to the version included, you can enjoy an assortment of filters by making an additional purchase.
- An abundance of frames
There is an assortment of frames each for business, for women and for men.
In addition to the version included, you can enjoy an even larger assortment of frames by making an additional purchase.
- Stamps for decorating and handy writable stamps
Is equipped with stamps to decorate photographs, and writable stamps which allows you to type texts freely.
In addition to the version included, you can enjoy an assortment of stamps and writable stamps by making an additional purchase.
![]()
Operating Environment / Important Points
Android OS : 2.1/2.2/2.3
Recommended Screen Resolution 320~480
Necessary Device Camera, SD Card
The application itself connects to the Internet.Beware that it may show up in your packet charge, depending on configuration contents or contract details.
![]()
- Launching
Start up the application, and touch the "Preset Camera" icon on the computer terminal program launcher (app list).When you start up the application after installation, please agree with the software product license document.
![]()
How to Use
1.Establish Preset
- Preset Name (Storing Folder Name)- Rules for file name
- Frames
- Filters
- Evernote Auto-Uploading
- Dropbox Auto-Uploading
The above items are customizable.
2.Take Photos Using Established Preset.
Photo data files under a Preset established name will be automatically allocated to folders under a Preset established name.Settings to fabricate photos, such as frames and folders, will also be applied according to Preset.
*Photos can be edited one at a time too.
Evernote and Dropbox can be designated to automatically store photos.
3.Preset Can Be Registered To the Widget.
A thumbnail with a Preset reflected can be registered to the Widget.Tapping the Widget will launch a camera with a certain Preset reflected.
4.Convert Photographs Taken Using a Certain Preset, To a Different Preset
Even after a photograph has been taken, you can easily convert and reflect a different Preset.5.Original Data Will Be Saved As Well
Photo data will be saved as a non-Preset-reflected original data too. It can also be used for purposes besides this app.Screen Configuration and Operation
Select / Edit and Create of established Preset can be performed here.
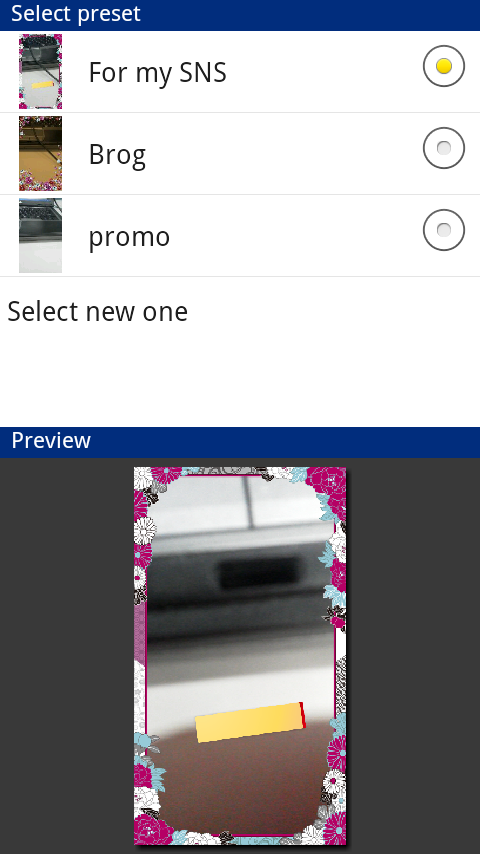
1.Preset
Tapping will launch a camera with corresponding Preset reflected.
Long-pressing will show a menu to either edit or delete the Preset.
2.Create new preset
Tapping will allow you to create a new Preset.
*To create over 3 Presets, you need to purchase and download a License Key.
3.Preview
Shows preview of camera screen with chosen Preset reflected.
- Camera Screen With Preset Reflected.
Screen to operate camera enabled to take photos using Preset.
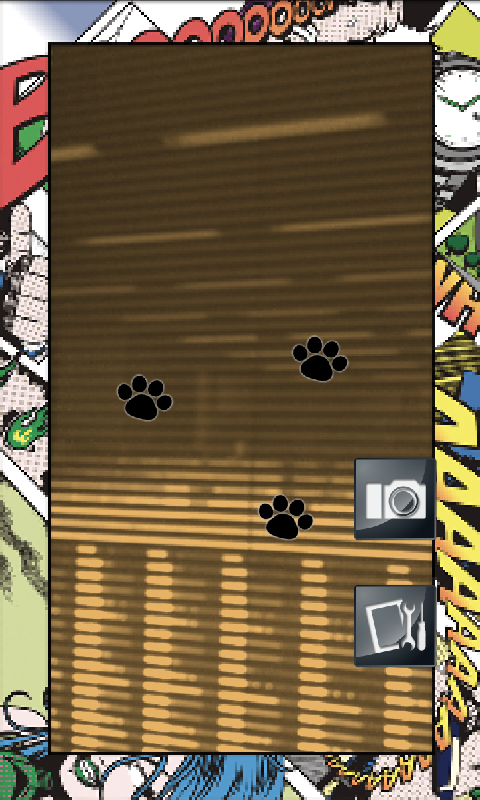
1.Camera Screen
Camera screen with Preset reflected.
Photo data previewed on this screen can be taken.
*Screen resolution of frames will become clearer after becoming photo data.
2.Camera Icon
Long-pressing will photograph using auto-focus.
3.Settings Icon
Edit Preset.
4.Frames
Can be edited on edit screen.
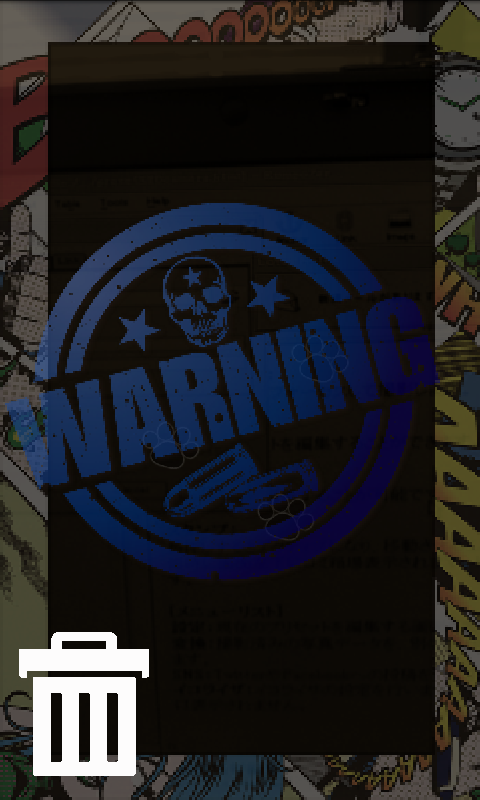
5.Stamps
Long-pressing will activate and enabled movement.
Trash Can will also be shown on the lower left hand of screen.
Drag-and-Drop to dispose.
Menu
Setting Show screen to edit Preset.
Convert Show screen to convert photo data to a different Preset.
Closing Shutdown this app.
Help Jump to web page to check Operation Manual.
Screen to customize each Preset.
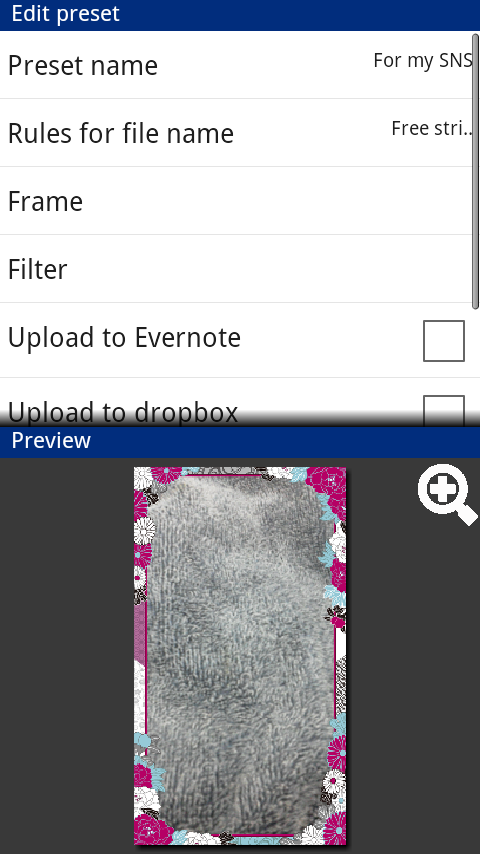
1.Preset Name
Customize name of Preset and storing folder.
Tapping will show a window to type text.
*Name of Preset and storing folder are the same.
2.Rules for file name
Customize rule to name photo data file.
Tapping will show window to type text and set rules.
- Free srring & date
- Free string & number
Select either of the above and type a text string of your choice.
3.Frames
Customize setting for frames, stamps and writable stamps.
Tapping will show screen to select frame.
4.Filters
Customize filter to apply on photos.
Tapping will show screen to select filter.
5.Upload to Evernote / dropbox
Select to or not to upload to Evernote, a Cloud Service.
Tapping will show window to input account and password.
Simultaneously, the checkbox will be checked. Photographing under these circumstances will auto-upload the photo data.
*Evernote will attach to Note, and a folder will not be created.
dropbox will store to a named folder.
6.Reflect this preset in the widget
An operation to reflect the chosen Preset to the Widget.
This operation will simultaneously create a thumbnail.
If you create a Widget after tapping, a Widget of most recently tapped Preset will be created.
7.Preview
Preview of camera reflecting a Preset.
Tapping will show a full-screen preview.
Editing of stamps can be done under this status.
*Full-screen preview will enable you to check filters.
Menu
Preview:Show a full-screen preview.
Evernote:Input Evernote account.
dropbox:Input dropbox account.
Closing:Shutdown this app.
Help:Jump to web page to check Operation Manual.
Screen to select frames / stamps / writable stamps.
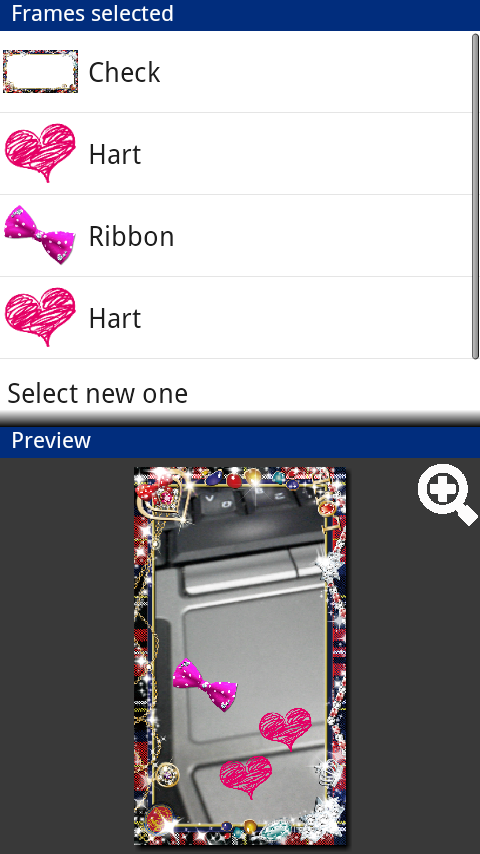
1.Frames
A chosen frame will be displayed by thumbnail.
Long-pressing on each frame will show window to delete.
*Only 1 frame can be set to each Preset.。
2.Stamps
A chosen stamp will be displayed like an icon.
Long-pressing on each frame will show window to delete.
*Multiple icons can be set to each Preset.
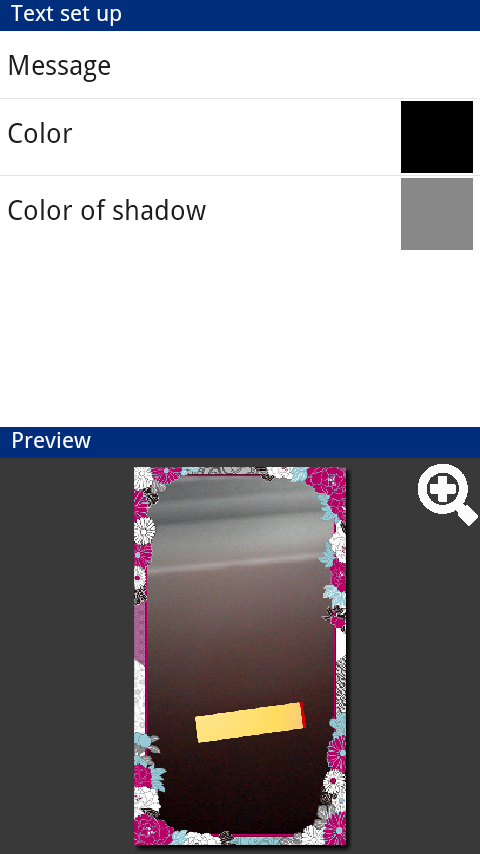
3.Writable stamps
A chosen writable stamps will be displayed like an icon.
Long-pressing on each frame will show window to delete.
Tapping on writable stamps will show window to customize.Message, color, and color of shadow can be edited.
*Multiple writable stamps can be set to each Preset.
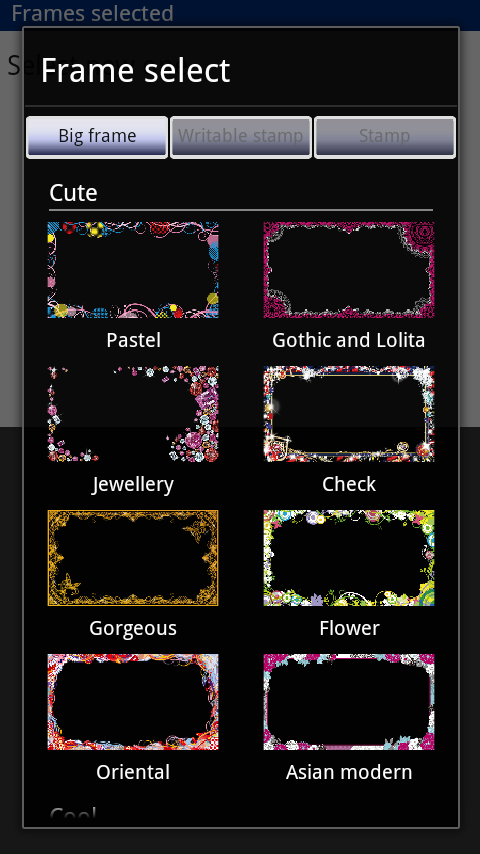
4.Create
When you choose Create, a window to select frame will appear.
- First, tap on a tab on the upper side of screen and choose a component to configure.
(Choose from frame / writable stamps / stamp)
- Next, choose item to Preset from each component.
*Items masked by icon are onerous.
Downloading an onerous item will enable you to use them.
Menu
Preview:Show full-screen preview.
Closing:Shutdown this app.
Help:Jump to web page to check Operation Manual.
Convert Preset on multiple photo data to a different Preset collectively.
First, select Preset which stores photo you want to convert.
Next, select photo data you want to convert.
Lastly, select Preset you want to convert to.
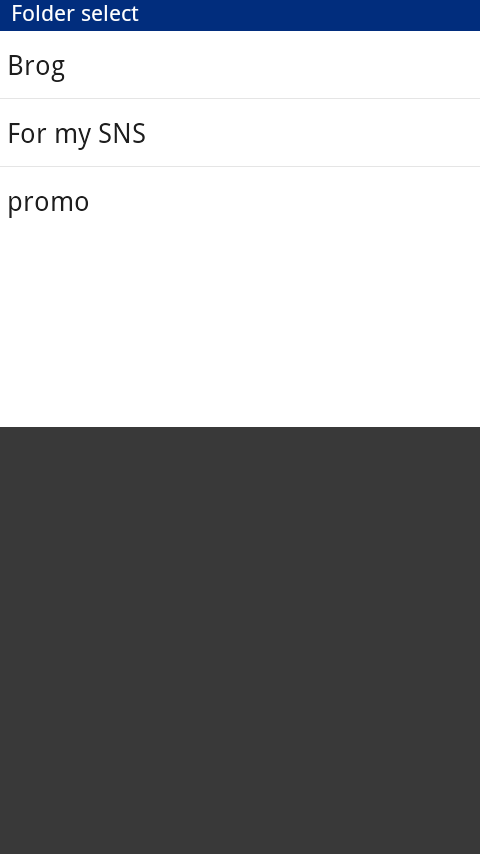
Folder select Screen
Tap on component of Preset you want to convert.
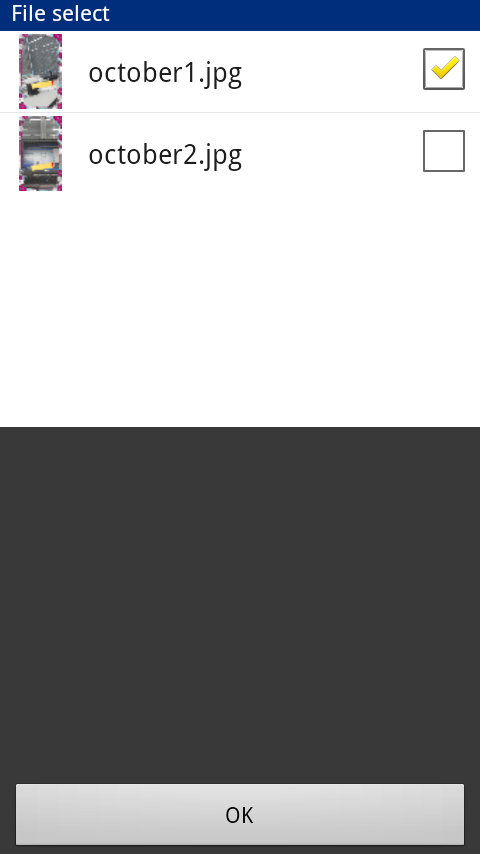
File select Screen
Tap and check on data you want to convert, and tap on OK.
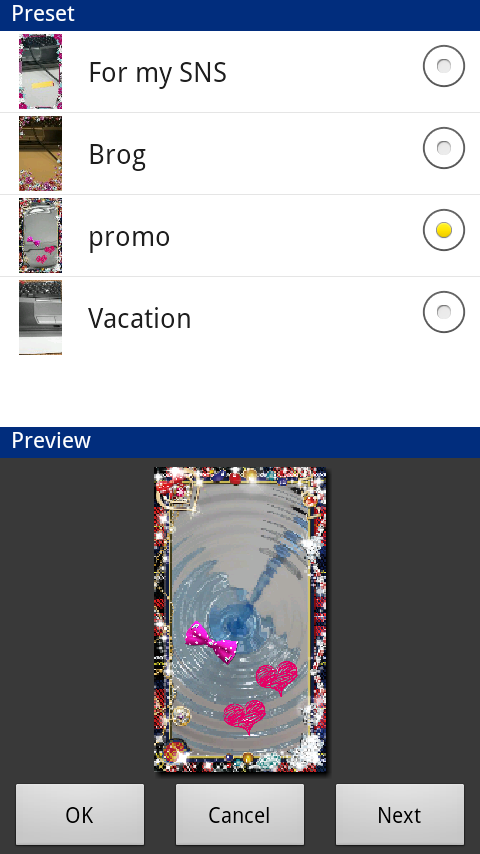
Preset Screen
First, tap on Preset component and select Preset to be reflected after conversion.
Preview screen will show converted photo data.
Next, tap on "Next" on preview screen and confirm photo data.
Last, tap on "OK" and photo will be converted.
Menu
Convert:Convert to previewing photo. Same operation as the above "OK".
Closing:Shutdown this app.
Help:Jump to web page to check Operation Manual.