Table of Contents
- Summary / Features- Operating Environment / Important Points
- Getting Started
- Screen Configuration
- Main Screen|Register / Edit Event| TO DO |Text
Memo|Photo Memo|Voice Memo|Diary
| Settings
- How to Use
- Register Event|Add Calendar|Change Calendar Design|Change Color Settings for
Event |
- Sync with Google
Calendar|Attach Extra
Information
Summary / Features
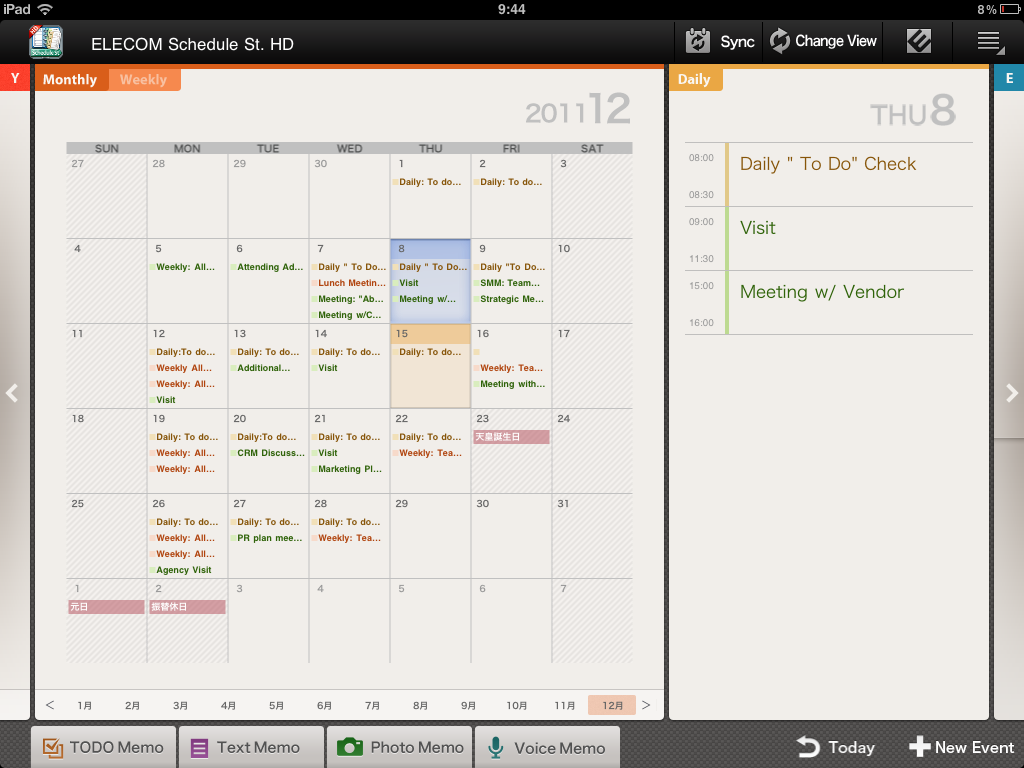
- Summary
Schedule St. HD is a personal organizer app including TO DO and text memo / photo memo / voice memo functionalities, also with the ability to change designs by purchasing additional design refills.It is also equipped with a Syncing function for Google Calendar, which is designed to link multiple devices such as a Smartphone and PC.The included TO DO and Memo function can be attached to events on the calendar, and by attaching necessary information it is possible to find the info at a moment’s notice.
With the ability to manage multiple calendars on Schedule St. HD, only the calendar which corresponds to your current needs can be displayed.Recommended for businessmen wanting an app they can use for both business and private purposes, or for mothers wanting to manage the entire family’s event at a glance.
- Features
・Calendar Layout Optimized for Tablet・Manage Multiple Calendar
・Change Calendar Design (Requires Additional Purchase of Design Refills)
・Synch with Google Calendar
・Group Management Enabled TO DO
・Includes Text Memo, Photo Memo, and Voice Memo
・Attach TO DOs and Memos to your Event
・Search Event
・Diary with "Kawaii" Feeling Icons
- Recommended Refill
You can change the design of your calendar on Schedule St. HD.By purchasing and installing a design refill app, the new design can then be applied to your calendar view.Design refills are constantly being added, so make sure to check for new purchasable designs refill on the refill list.
* To purchase paid design refill, the Ads on daily view will be removed.
Operating Environment / Important Points
iOS 4.0 and above
iPad, iPad mini, iPad Air
Getting Started
- Launching
Start up the basic application, and touch the "Schedule St. HD" icon from the computer terminal program launcher (app list).After you start up the basic application after installation, please agree with the software product license document, and complete the "Calendar Storage Location" and "Acquire Holiday Information" steps.
- Calendar Storage Location
Select the storage location of your calendar from the choices "Schedule St. HD" or "Google Calendar"."Schedule St. HD" Save calendar within app.Calendar cannot be viewed from another app.
Syncing with Google Calendar is enabled, and calendar can be viewed from PC and other devices.
- Acquire Holiday Information
Acquire holiday information from the internet. Select country to continue.- Calendar View and Calendar Group
Calendar for Schedule St. consists of "Calendar View" and "Calendar Group".A registered event will be registered to one of the "Calendar Groups"."Calendar View" indicates the calendar on screen, and will display your event from the "Calendar Group".
For example, you can create Calendar Groups for "Business" and "Private", and create Calendar Views for "Business" and "Main".By registering "Business" Calendar Group to "Business" Calendar View, a calendar that only shows the event for the "Business" Calendar Group will be created, and by registering "Business" and "Private" Calendar Groups to "Main" Calendar View, a calendar that shows the event for "Business" and "Private" will be created.
Calendar View can be switched whenever necessary, so you can filter only the content you want to check.
- Create Calendar View
Menu Bar:Create Calendar View from Submenu / Settings / Calendar View Settings / Add new- Create Calendar Group
With this app, creation of Calendar Groups are enabled only when "Schedule St. HD" is selected as the Calendar Storage Location.If "Google Calendar" is selected, you can not create / add a Calendar Group from Google Calendar on the Web.Menu Bar: Create Calendar Group from Submenu / Settings / Calendar Group Settings / Add new
Screen Resolution
- Main Screen
The Main Screen consists of "Yearly", "Monthly / Weekly", "Daily", and "Schedule Details" screens connected side by side.Touching the button on the edge of the screen will scroll to the next screen.
- Yearly Calendar
Show yearly calendar.Touching a month will transition to the chosen month.Touching a year on the lower part of the screen will update content to the chosen year.- Monthly Calendar
Show monthly calendar.Touching a date will update content to the chosen date of the daily calendar. Touching a month on the lower part of screen will update content to the chosen month.
- Weekly Calendar
Show weekly calendar.Touching a date will update the content to the chosen date of the daily calendar.Touching a week on the lower part of screen will update content to the chosen week.Up/Down flick to scroll up/down.
- Daily Calendar
Show daily calendar. Touching event will scroll the screen to show the details for the chosen event.- Menu Bar
Sync Sync with Google Calendar (Only when using Google Calendar).Change View Switch Calendar View.
ELECOM App Site Open "ELECOM App Site" on your browser.
Submenu Show submenu.
- Submenu
Settings Show settings.
Refill Show list of purchasable refills.
Search Search event.
Help Open "Online Manual" on your browser.
Version Show version information.
- Toolbar
TO DO Memo Show TO DO list.
Text Memo Show text memo list.
Photo Memo Show photo memo list.
Voice Memo Show voice memo list.
Diary shows diary list.
- Event Details
Location Touch to show your location with Google Map.
Duplicate Copy event.
Edit Edit event.
Delete Delete event.
Add Info Add additional information to event.

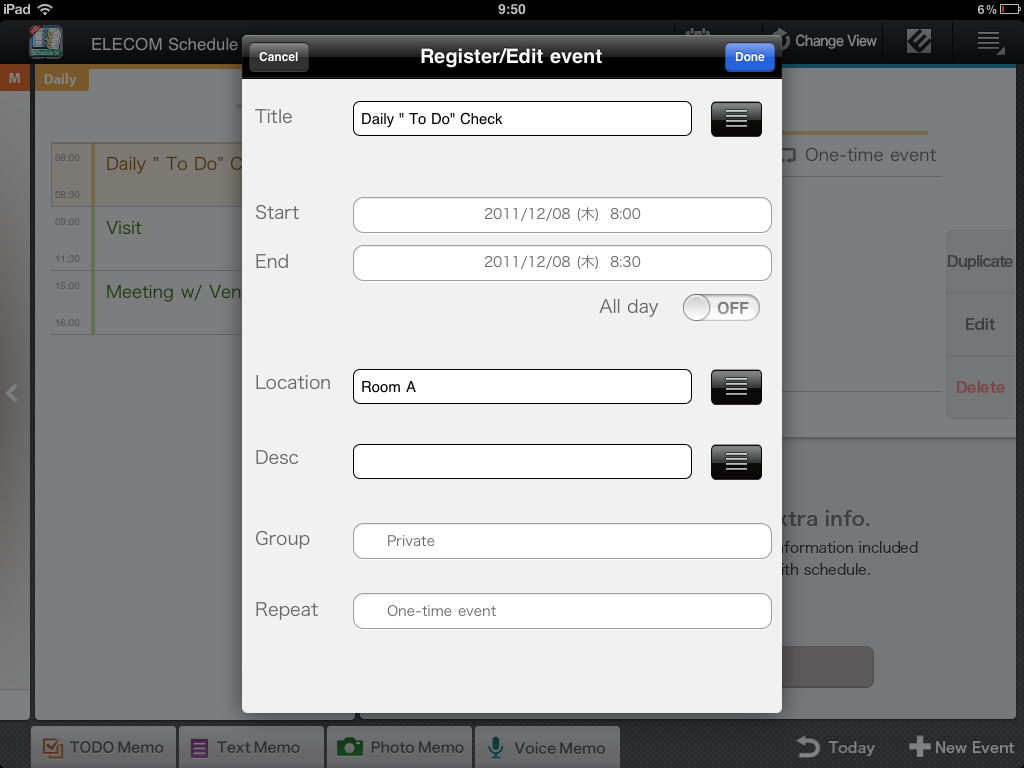
- Register / Edit event
Group Select Calendar Group to register event.Only the Calendar Groups
registered to the currently displayed Calendar Group can be selected.
Also, you cannot select Google Calendar's read-only Calendar Group for
friends and holidays.
- Search event
Search Keyword Enter keyword to search. You cannot designate multiple keywords.Search Period Designate the time period you want to search.
Search Run search.
Exit Close search screen
Result List Show list of event search results. Touching a event will update to the event details screen.

- TO DO
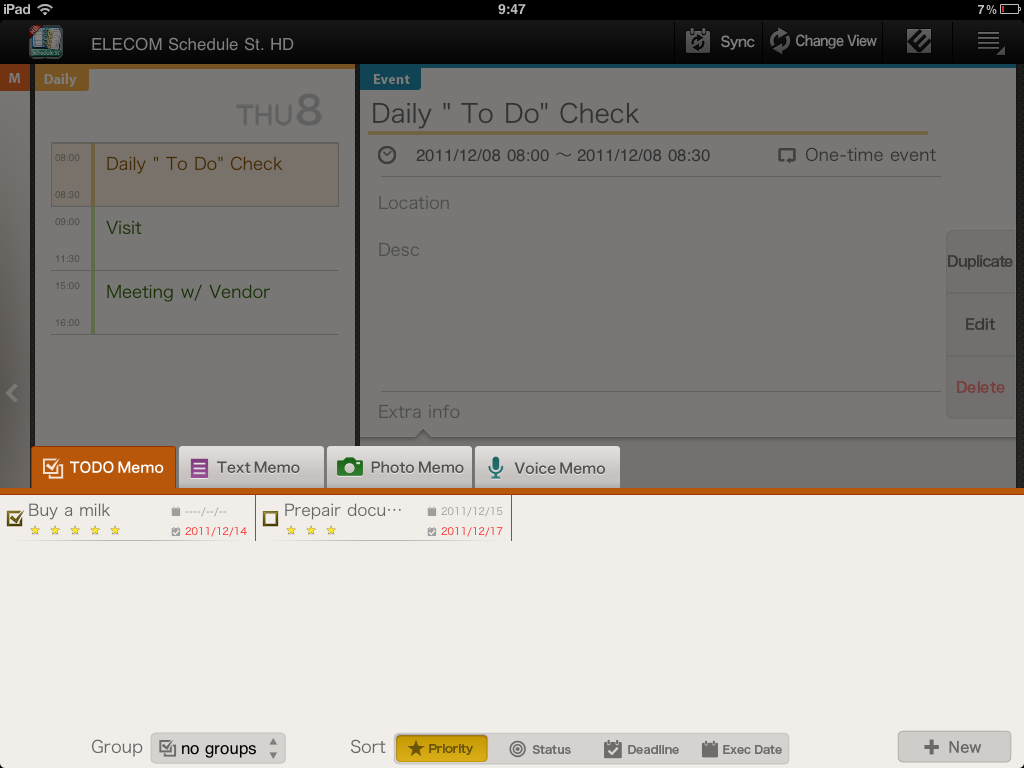
Group List Change the displayed group.Create new group from “Create New
Group”.
Priority Sort TO DO list by priority.
Status Sort TO DO list by status.
Deadline Sort TO DO list by due date.
Exec Date Sort TO DO list by execution date.
New Add TO DO.
- Edit TO DO
Input each item of TO DO.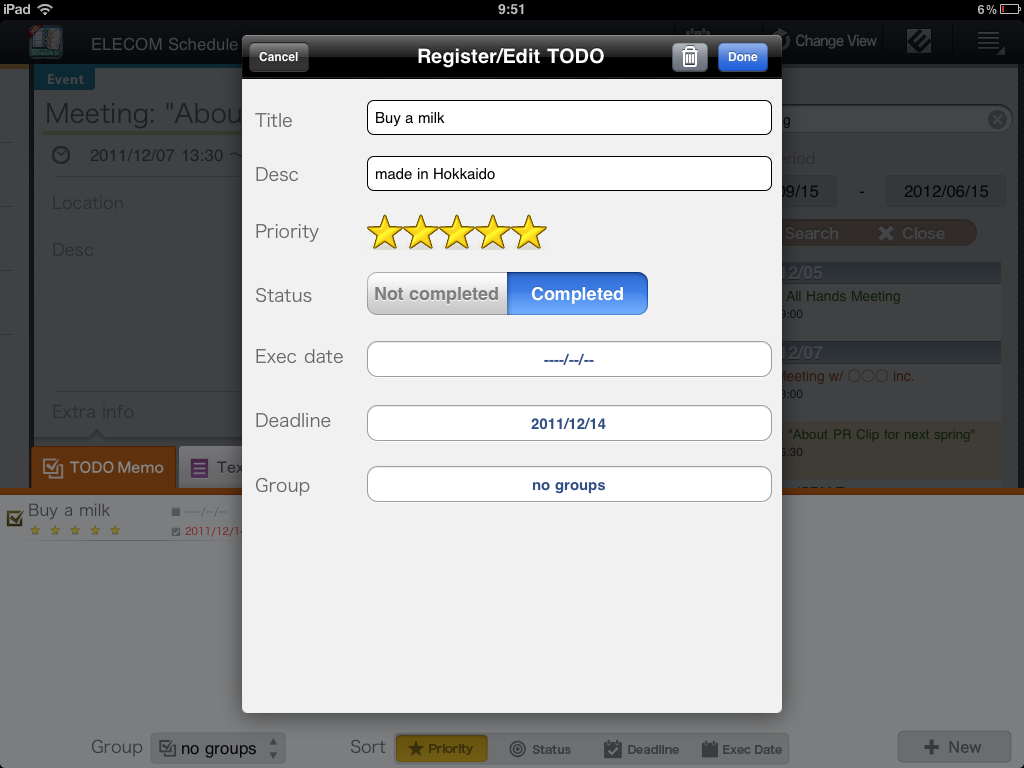
- Text Memo
New Add text memo.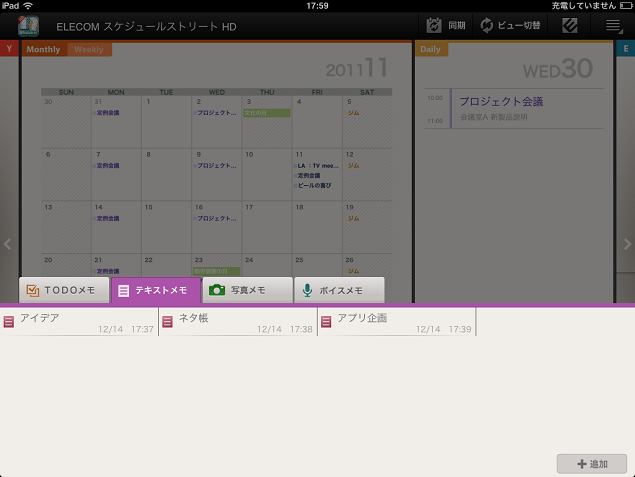
- Edit Text Memo
Input each item for text memos.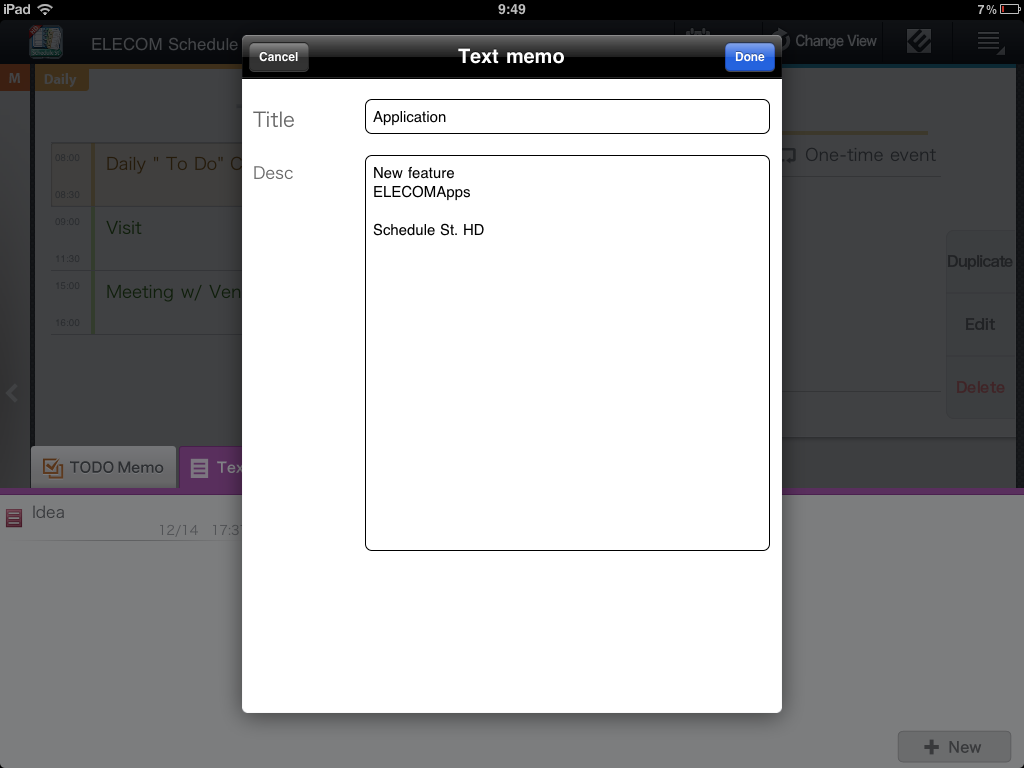
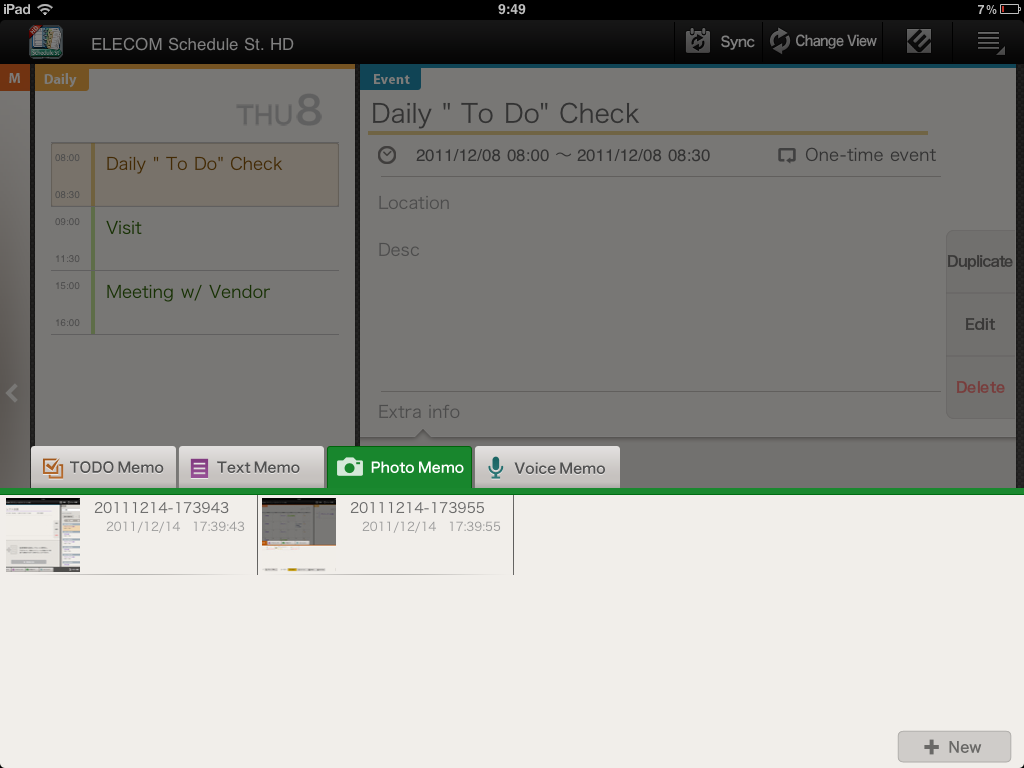
- Photo Memo
New Add photo memo. Your terminal's camera app will launch, and you can
shoot / save.
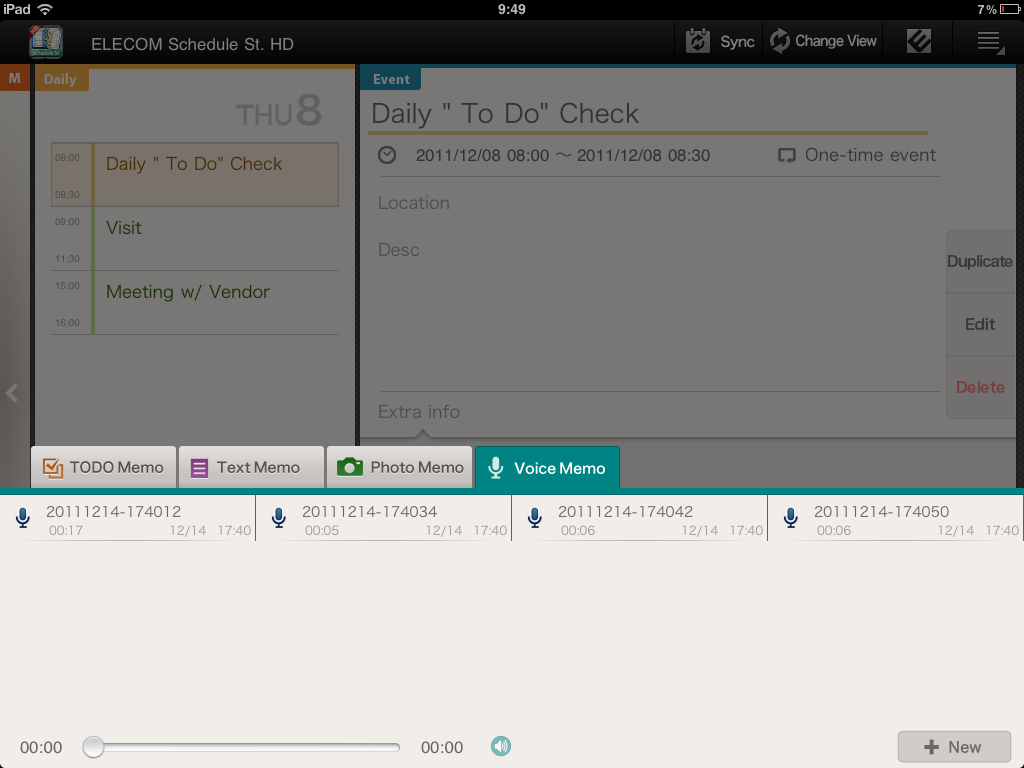
- Voice Memo
Voice Memo List Show list of voice memos. You can scroll Up/Down.Play Bar Change play position of the chosen voice memo.
Play / Pause Play / Pause voice memo.
New Record voice memo.
- Record Voice Memo
Record Time Show recorded time.Record Level Show level of recording.
Record Start recording.
Stop Stop recording.
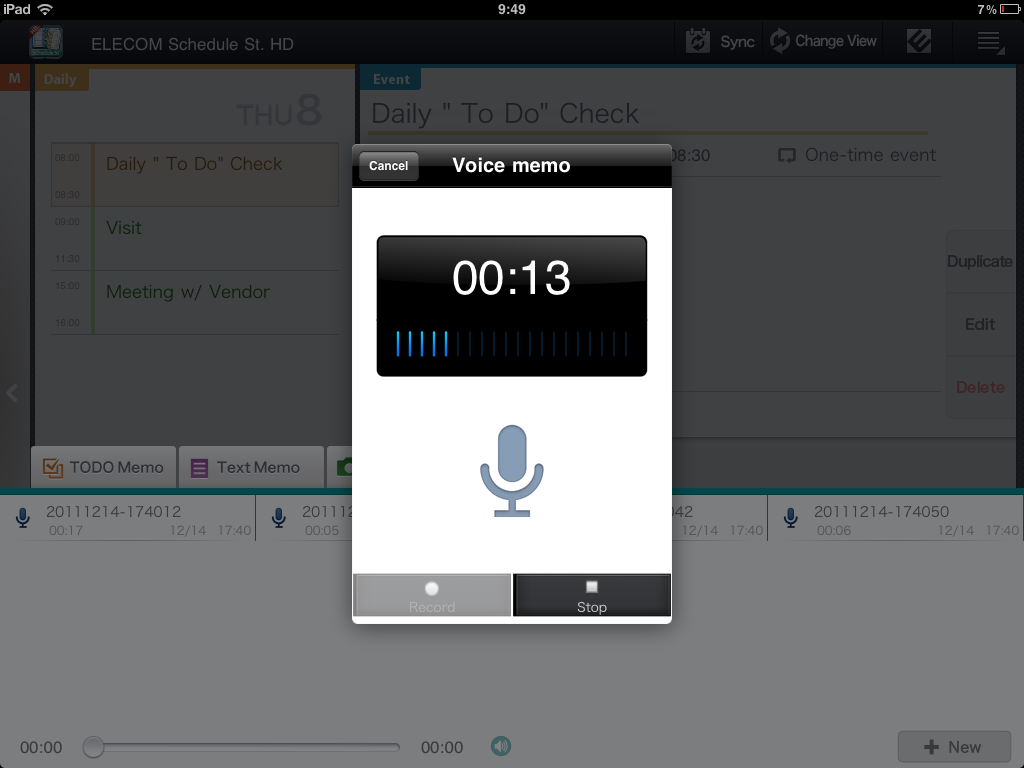
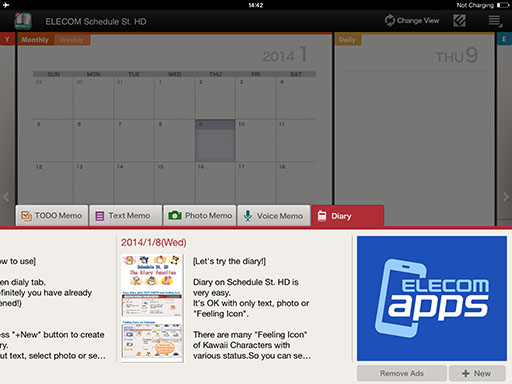
Diary List: Displayes the list of diary. Horizontal scroll is available. By touching the contents, it will be navigated to Diary View Screen.
Remove Ads: By purchasing the diary license key, the Ads on diary function will be removed. You can confirme the price before you purchase.
* If you have already purchased items, it can be restored.
New: Adds diary.

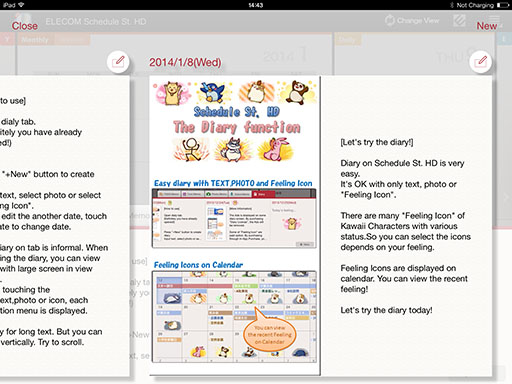
- View Diary
Feeling Icon: Displayes the selected feeling icons
Text: Displays recorded text. If there are many lines, the vertical scroll is available.
Photo: Displays the registered photo.
Edit: It will be navigated to Diary Edit Screen.
* By touching the date, text, photo or feeling icons, the operation menu will be displayed.
* By deleteing the date, the whole contents of specified date
will be removed.
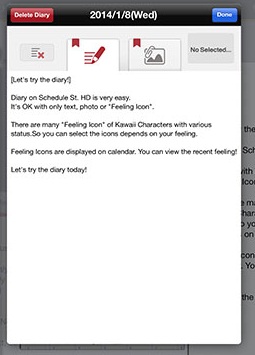
- Edit Diary
Date: Displays the date of diary.
Done: Saves edited contents.
Delete Text/Photo: Clear text or photo.
Diary Tab: Displays text of diary. You can edit the text.
Photo Tab: Displays photo of diary. You can take a photo with camera or import phtoto from camera roll.
* Only one photo can registered for each date.
Feeling Icons: Displays feeling icon.By touching it, it will be navigated to Feeling Icon selection.
- Select Feeling Icon
You can also select "No Select" to remove icon.
* If you have already purchased items, it can be restored.
![]()
- Calendar View Settings
Name Enter name of Calendar View.
Calendar Design Select the design you wish to apply.Only "Default" can be selected at first.Add more by purchasing additional design refills from "Refills".
Calendar Group Select Calendar Group to display on Calendar View.Multiple Calendar Groups can be selected.
Show Details Settings
First Day Select day to start on. Applies only to monthly / weekly items.Background Color for event Select background color for each day.
Show Week Number Show week number when ON.
Font size for event title: Select character size for your event.
Feeling Icon settings: Configure the feeling icon.
- Calendar Group Settings
Establish settings for each Calendar Group.You can create a new entry if you have selected "Schedule St. HD" as the Calendar Storage Location.Name Enter name of Calendar Group.
Color Select color for Calendar Group.
- Calendar Storage Location
Select location to save calendar from "Schedule St. HD" or "Google Calendar".“Schedule St. HD” Save calendar within app.Calendar cannot be viewed from other apps.
Syncing with Google Calendar is enabled, and the calendar can be viewed from a PC and other devices.
- TO DO Settings
Establish various TO DO settings.- Holiday setting
Acquire holiday information from Internet.How to Use
- Register event
Register event from Toolbar-New event.(Register / Edit event)- Add Calendar
If you want to create multiple calendars and display event by goals, you need to create a Calendar View.Create Calendar View from Menu Bar Submenu / Calendar View Settings / Add new
- Change Calendar Design
You may apply different designs to the calendar.By purchasing design refills in InApp Purchase, , you will be able to select the new designs from Calendar View Settings.Check purchasable design refills on the refill list. (Refill List)
- Change Color Settings for event
Color of event displayed is the color of the Calendar Group which the event is registered to.If the storage location of the calendar is "Schedule St. HD", you can change the color of the Calendar Group, but if it is set as "Google Calendar", you cannot change the color of the Calendar Group on this app, and will need to change the color of the Calendar Group by using Google Calendar on the Web.- Sync with Google Calendar
If you want to view and edit your calendar on PC and/or Smartphone, or if you want to share your event with family, friends, or co-workers, Syncing with Google Calendar is a very useful feature.Select "Google Calendar" from Menu Bar Submenu / Settings / Calendar Storage Location
When you update event, touching {Menu Bar: Sync} will start the Syncing process.After Syncing, you can check from a PC or other device to see whether the changes are being reflected.
- Attach Extra Information
Manage your event by attaching created TO DO lists or Text / Voice / Photo memos to various events.By associating necessary information to your event, you can quickly few only the pertinent information.Touch the "Add" button on the event details screen, and select the item you wish to add.


